

Welcome to the dark side… or the light side, depending on where you’re standing. Either way, it seems you’ve acquired an iPhone. Whether it’s your first iPhone or not, you may be open to a few tips when it comes to setting it up properly.
Before diving into the setup process, you’ll want to make sure you have a few things within reach. Make sure you have your Apple ID and passcode handy, along with your current iPhone’s passcode. These will be essential during the setup process.
There’s also your Wi-Fi SSID and password – these will come in handy. Additionally, if your new iPhone doesn’t have a physical SIM card tray, you’ll be setting up an eSIM. If transitioning from Android to iPhone with eSIM, obtain a QR code from your carrier.
Step 1: First-time iPhone setup
Looks like you’re ready to set up your new iPhone. You may be lucky enough to have unwrapped a brand-new device, but setting up a secondhand iPhone is just as exciting. Just make sure the older phone is properly wiped and the previous owner removed their Apple ID from the device.
Power on your iPhone: Press and hold the Side Button (located on the right edge of all models) to turn on your new iPhone.
Follow the onscreen instructions: Sounds easy enough, right? Go through the instructions to select your language, and region and connect to Wi-Fi. Set up Face ID or Touch ID and create an Apple ID if you don’t already have one.
Read More: How to set up iCloud on your Windows PC
Step 2: Transitioning from an old iPhone
Check software updates (on the old device): Ensure your old iPhone is running the latest software version by navigating to Settings > General > Software Update > Update Now. Back up your old iPhone to iCloud by going to Settings > [Your Name] > iCloud > iCloud Backup > Back up now.
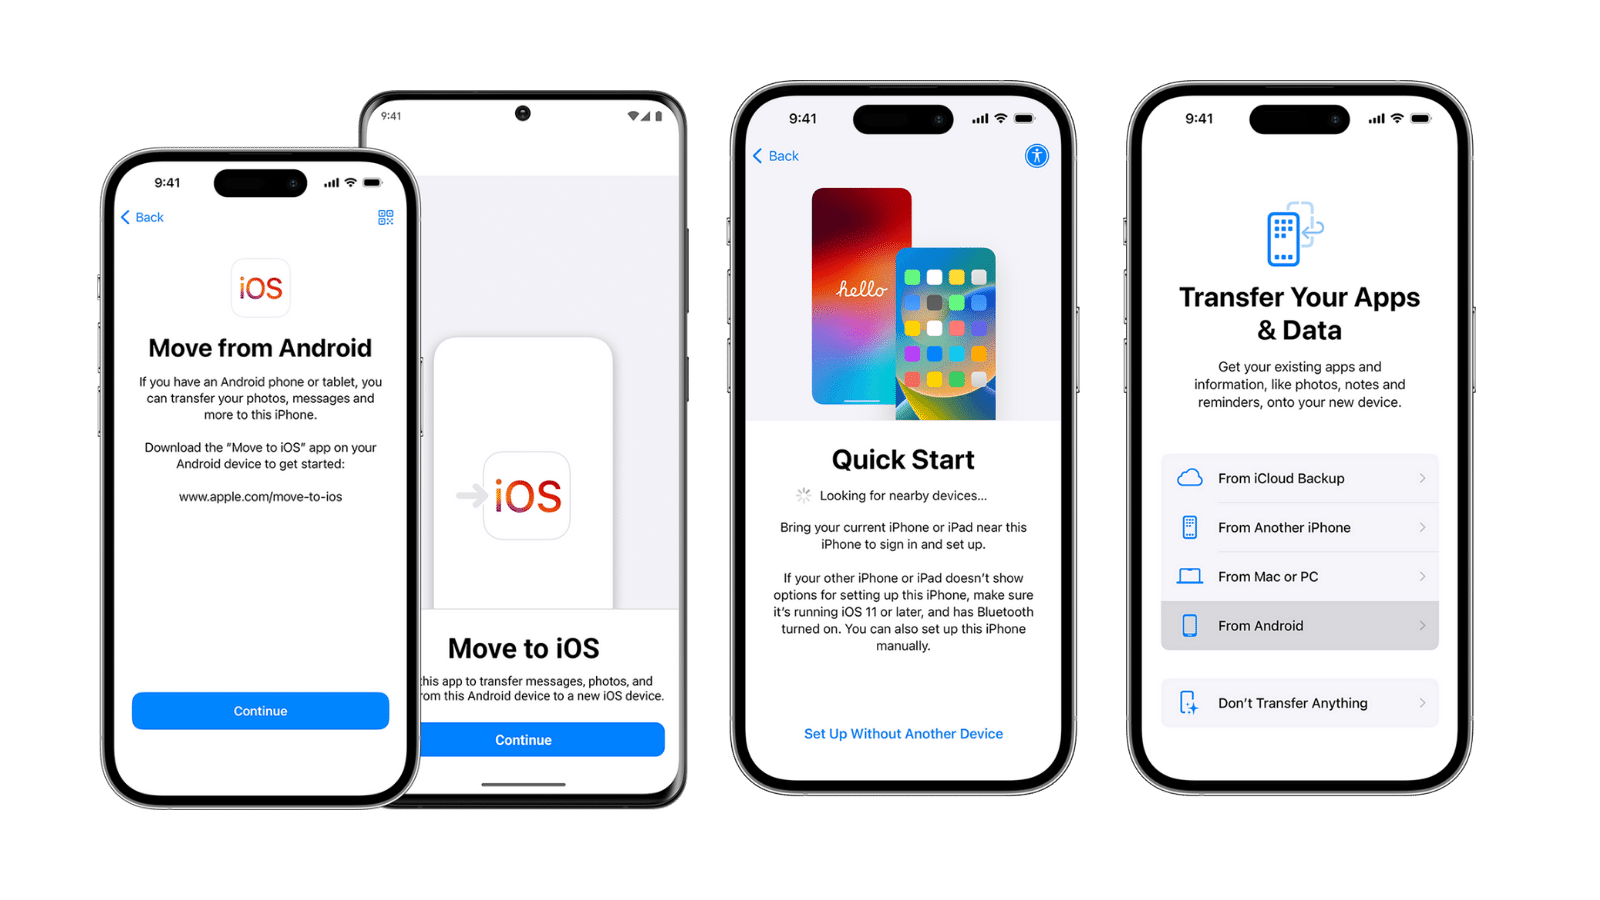
Transfer your data: During setup (on the new device), choose the “Transfer Your Data” option. Hold your old iPhone near the new one and follow the onscreen prompts to transfer data. Ensure your old iPhone is backed up in advance.
Step 3: Complete the setup
You may have already inserted your physical SIM if you have one. Otherwise, you’ll have to set up your eSIM at this stage.
An eSIM, or ’embedded SIM’, which means you won’t need a physical SIM to connect to your mobile network. If you’ve got one of these, follow the onscreen instructions to transfer your number. For Android-to-iPhone transfers, scan the QR code provided by your mobile network.
Update your iPhone: After setup, check for software updates by going to Settings > General > Software Update. Install any available updates to ensure optimal performance and security.
Read More: Why you shouldn’t give your older tech to your old relatives
Step 4: Get accustomed to iOS
Learn gestures: Practice essential gestures like swiping up from the bottom of the screen for the home screen. Use the grabber bar to switch between apps quickly and efficiently.
Customise your device: Personalise your home screen, lock screen, and wallpaper to reflect your personal style. Explore features like Do Not Disturb and you can now go ahead and customise the Action Button for added convenience.
Explore accessibility options: iOS offers some nifty accessibility features like Zoom for enhanced readability. Customise your iPhone with essential apps and games to suit your lifestyle and interests.